http://www.ventanazul.com/webzine/articles/open-source-app-for-database-modelling
Posted by xHuro
,
#서론
TurboGears의 TGWebService는 현재 1.2.0까지 릴리즈된 상태이다. decorator를 이용하여 간단하게 WSDL을 자동으로 생성해주는 기능이 강력하지만(이전 포스트 참조), wsvalidate decorator를 사용할 때 Custom Objects에 대해서는 WSDL을 생성해주지 않는 문제가 발생한다. (편법으로 전혀 사용하지 않는 메소드를 하나 만들고, 그 메소드의 wsexpose에 Custom Objects 넣어주면 문제점을 피해갈 수 있으나, 정상적인 방법도 아닐 뿐더러 소스 코드도 깔끔해지지 않는다. 이전 포스트가 이런 편법이었다.)

이번 포스트에서는 Java와 연동에 앞서, 위의 WSValidate 문제점을 살펴보고, 커스터마이징해보도록 한다.

#필요한 Library
TGWebService(http://code.google.com/p/tgws/) : 사이트가 code google로 이사했다

#WsValidate의 문제점
TGWebService의 README 파일의 Custom Objects as Input 항목에서 설명하는데로 실행하면 WSDL에 반영되지 않는 문제점이 생긴다.

아래의 소스는 이전 포스트의 WebService 클래스를 조금 수정한 것이다. (wsexpose에는 아무것도 없고, wsvalidate에만 Custom Objects를 넣어줬다)

  @CodeGeass
from tgwebservices.controllers import WebServicesRoot, \
    WebServicesController, wsexpose, wsvalidate

from tgwebservices.runtime import typedproperty, unsigned
class Person(object):        
    name = ''
    id = ''

class CodeGeass(WebServicesRoot):
    @wsexpose()
    @wsvalidate(Person)
    def getPerson(self, value):
        person = value
        print person.id
        print person.name

이전 포스트와 동일하게 WSDL을 확인해보자.
http://localhost:8080/codegeass/soap/api.wsdl
   <wsdl:types>
     <xsd:schema elementFormDefault="qualified" targetNamespace="http://localhost:8080/codegeass/soap/types">
          <xsd:element name="getPerson">
            <xsd:complexType>
              <xsd:sequence>
                <xsd:element name="value" type="types:Person"/>
              </xsd:sequence>
            </xsd:complexType>

          </xsd:element>
          <xsd:element name="getPersonResponse">
            <xsd:complexType>
              <xsd:sequence>
                <xsd:element name="result" type="xsd:string"/>
              </xsd:sequence>
            </xsd:complexType>
          </xsd:element>
      </xsd:schema>

   </wsdl:types>
   <wsdl:message name="getPersonRequest" xmlns="http://localhost:8080/codegeass/soap/types">
       <wsdl:part name="parameters" element="types:getPerson"/>
   </wsdl:message>
   <wsdl:message name="getPersonResponse" xmlns="http://localhost:8080/codegeass/soap/types">
      <wsdl:part name="parameters" element="types:getPersonResponse"/>
   </wsdl:message>
... 후략
: 눈 씻고 찾아봐도, getPerson의 value type인 types:Data를 찾을 수 없다. 결국 이 WSDL을 사용하는 Client들은 types:Data에 대한 정보를 알 수 없게 되어, 이 메소드를 사용할 수 없게 된다.

#WSDL에 wsvalidate Decorator의 Custom Objects Type을 넣어주기 위한 해결책
편법적인 방법을 말고 좀더 근본적인 문제를 해결해 보도록 한다. TGWebService가 설치되어 있는 디렉토리를 둘러보면, controller.py가 있다. 이 안은 WebService 클래스안 각 메소드의 decorator 기능이 정의되어 있다.

  @wsexpose에 대한 정의
def wsexpose(return_type=basestring):
    """Exposes a method for access via web services. Only one value
    can be returned because many languages only support a single
    return value from methods.
    
    @param return_type the class that will be returned. This is used to
                       help statically typed clients."""
  ... 중략

        # a list denotes that the user is returning an array of the type
        # given by the first element in the array
        # we need to keep track of the complex types so that they can be
        # defined as appropriate for the given protocol
        if isinstance(return_type, list):
            rt = return_type[0]
            if rt not in primitives:
                register_complex_type(fi, rt)
        elif return_type not in primitives:
            register_complex_type(fi, return_type)

        return newfunc
    return entangle
: 볼드 표시된 부분을 자세히 살펴보자.
이전 포스트에서 언급하였듯이 wsexpose는 해당 메소드의 return_type을 설정하는 decorator이다. 볼드 표시한 부분은 return_type을 확인해서 알맞게 type을 등록하는 것을 알 수 있다.(return_type이 list인지, primitives인지, not primitives인지...)

  @wsvalidate에 대한 정의
def wsvalidate(*args, **kw):
    """Validates and converts incoming parameters. Also registers the
    parameters used by the method for use by statically typed languages.
    Method parameters can be specified via positional or keyword arguments.
    You should pass in the class used for each parameter."""
    def entangle(func):
        fi = register(func)
        input_types = dict()

        # match up the validators with the function parameters
        # the validators list doesn't include self, but the parameters list
        # does. So, the parameters list is offset by one higher.
        for i in range(0, len(args)):
            argtype = args[i]
            input_types[fi.params[i]] = argtype

        input_types.update(kw)
        fi.input_types = input_types
        return func
    return entangle
: wsvalidate는 위 wsexpose처럼 inpyt_type을 체크하고 type을 등록하는 부분이 없다. 그래서 아래와 같이 추가해준다. (wsexpose와 비슷하다.)

  @수정된 wsvalidate에 대한 정의
        # the validators list doesn't include self, but the parameters list
        # does. So, the parameters list is offset by one higher.
        for i in range(0, len(args)):
            argtype = args[i]
            input_types[fi.params[i]] = argtype

            if isinstance(argtype, list):
                rt = argtype[0]

                if rt not in primitives:
                    register_complex_type(fi, rt)
            elif argtype not in primitives:
                register_complex_type(fi, argtype)
 ... 후략

TurboGears를 멈추고, 리스타트하고 다시 WSDL을 확인해보자
<wsdl:types>
     <xsd:schema elementFormDefault="qualified" targetNamespace="http://localhost:8080/codegeass/soap/types">
        <xsd:complexType name="Person">
          <xsd:sequence>
            <xsd:element name="id" type="xsd:string"/>
            <xsd:element name="name" type="xsd:string"/>

          </xsd:sequence>
        </xsd:complexType>
          <xsd:element name="getPerson">
            <xsd:complexType>
              <xsd:sequence>
                <xsd:element name="value" type="types:Person"/>
              </xsd:sequence>
            </xsd:complexType>
          </xsd:element>
          <xsd:element name="getPersonResponse">
            <xsd:complexType>
              <xsd:sequence>
                <xsd:element name="result" type="xsd:string"/>
              </xsd:sequence>
            </xsd:complexType>
          </xsd:element>
      </xsd:schema>
   </wsdl:types>
: 볼드 표시된 부분이 추가되었음을 알 수 있다.

#또 하나의 문제점...
이로써, 프로젝트 진행 중에 발생한 Custom Object는 해결이 되었으나, 또하나의 문제점이 발생하였다. wsvalidate에 List type([int], [float], [custom]...)을 적용하면 역시 WSDL에 반영되지 않는 것이다.

다음과 같이 array로 선언하고, WSDL을 확인해보자.
  @List type에 대한 CodeGeass
from tgwebservices.controllers import WebServicesRoot, \
    WebServicesController, wsexpose, wsvalidate

from tgwebservices.runtime import typedproperty, unsigned
class Person(object):        
    name = ''
    id = ''

class CodeGeass(WebServicesRoot):
    @wsexpose()
    @wsvalidate([Person])
    def getPerson(self, value):
        person = value
        print person.id
        print person.name

  @List type에 대한 WSDL
<wsdl:types>
     <xsd:schema elementFormDefault="qualified" targetNamespace="http://localhost:8080/codegeass/soap/types">
        <xsd:complexType name="Person">
          <xsd:sequence>
            <xsd:element name="id" type="xsd:string"/>
            <xsd:element name="name" type="xsd:string"/>
          </xsd:sequence>
        </xsd:complexType>
          <xsd:element name="getPerson">
            <xsd:complexType>
              <xsd:sequence>
                <xsd:element name="value" type="types:Person_Array"/>
              </xsd:sequence>
            </xsd:complexType>
          </xsd:element>
          <xsd:element name="getPersonResponse">
            <xsd:complexType>
              <xsd:sequence>
                <xsd:element name="result" type="xsd:string"/>
              </xsd:sequence>
            </xsd:complexType>
          </xsd:element>
      </xsd:schema>
   </wsdl:types>
: 도대체 types:Person_Array에 대한 정의는 어디에 숨었을까?

#WSDL에 wsvalidate Decorator의 List type 적용하기 위한 해결책
TGWebservice 소스중 soap.py를 분석해보자. 소스의 soapController 클래스는 일반 WebService 클래스의 wsexpose, wsvalidate Decorator의 분석 결과(위의 controller.py에서 체크한 결과)를 wsdl.html 템플릿으로 내뱉어주는 클래스다. 소스 코드의 마지막 부분에 있는 내부 메소드, _initialize_arrays 메소드를 잠시 들여다 보자.

  @soap.py 소스
...전략

    def _initialize_arrays(self):
        arrays = set()

        for func in self.wscontroller._ws_funcs.values():
            input_types = func._ws_func_info.input_types
            soap_type(func._ws_func_info.return_type, arrays)

        for cls in self.wscontroller._ws_complex_types:
            for key in ctvalues(cls):         
                soap_type(getattr(cls, key), arrays)
        self.arrays = arrays
: 일반 WebService 클래스(self.wscontroller)에 정의되어 있는 메소드의 return type을 arrays에 담는 작업(첫번째 loop)과 Custom Object type(두번째 2중 loop)을 arrays에 담는 작업을 이 _initialize_arrays에서 담당한다. 이 arrays는 이후 wsdl.html에서 loop를 돌면서 wsdl:type에 대해 출력한다.

이 메소드를 기준으로 소스를 분석해보면 return type(wsexpose)에 대해서만 처리할 뿐, input type(wsvalidate)에 대한 처리가 없음을 알 수 있다. 소스를 다음과 같이 추가하여 해당 메소드의 input type에 대한 처리하도록 한다.

  @수정된 soap.py 소스
    def _initialize_arrays(self):
        arrays = set()

        for func in self.wscontroller._ws_funcs.values():
            input_types = func._ws_func_info.input_types
            soap_type(func._ws_func_info.return_type, arrays)

            for it_key in input_types:        
                soap_type(input_types[it_key], arrays)

        for cls in self.wscontroller._ws_complex_types:
            for key in ctvalues(cls):         
                soap_type(getattr(cls, key), arrays)
        self.arrays = arrays

다시 한번 WSDL을 확인해보자
  @수정된 List type에 대한 WSDL
  <wsdl:types>
     <xsd:schema elementFormDefault="qualified" targetNamespace="http://localhost:8080/codegeass/soap/types">
        <xsd:complexType name="Person">
          <xsd:sequence>
            <xsd:element name="id" type="xsd:string"/><xsd:element name="name" type="xsd:string"/>
          </xsd:sequence>
        </xsd:complexType>
          <xsd:element name="getPerson">
            <xsd:complexType>
              <xsd:sequence>
                <xsd:element name="value" type="types:Person_Array"/>
              </xsd:sequence>
            </xsd:complexType>
          </xsd:element>
          <xsd:element name="getPersonResponse">
            <xsd:complexType>
              <xsd:sequence>
                <xsd:element name="result" type="xsd:string"/>
              </xsd:sequence>
            </xsd:complexType>
          </xsd:element>
        <xsd:complexType name="Person_Array">
          <xsd:sequence>
            <xsd:element maxOccurs="unbounded" name="item" nillable="true" type="types:Person"/>
          </xsd:sequence>
        </xsd:complexType>
      </xsd:schema>
   </wsdl:types>
: 전에 없었던 Person_Array에 대한 정의가 생겼음을 확인할 수 있다. Person_Array 안 element의 type 역시 Person으로 정의된 걸 알 수 있다.

#결론
지금까지 wsvalidate Decorator에 Custom Object나 List Type을 적용할 경우 WSDL에 반영되지 않는 문제점과 그 해결책을 확인해보았다. Python 자체가 Dynamic Typed Language라서 Input Type에 대한 체크를 하지 않는 것 같은데, 실질적으로 내가 참여한 프로젝트는 Java와 Python 사이를 WebService
로 연동하기 때문에, 수정전의 WSDL로는 Java로 클라이언트를 생성할 수가 없었다.

앞으로 TGWebServices가 버전업될 때 마다 패치하기 보다는, 반영되는 것을 기대하는 것이 좋을 듯 싶다.
Posted by xHuro
,
사용자 삽입 이미지

데스크탑에 설치된 Ubuntu 7.10

정식 릴리즈되자마자, 여러가지 버그가 발생되었던 Ubuntu 7.10 Gutsy Gibbon.
요즘 소심해져서인지 삽질이 두려워 일주일 동안, 눈치만 보다가 오늘 설치했다.

설치하면서 느꼈던 문제점들은...

1. scim 문제. scim 데몬이 자동으로 뜨지 않는 문제.

ubuntu.or.kr에 보면 해결책이 나와있어 쉽게 해결..

2. gdm에서의 로그인 이후, 데스크탑 진입까지의 속도 문제.
이전보다 체감속도가 느리다. 시간나면 원인을 파악해야겠다.


그 외에는 아직까지는 문제점이 잘 보이지 않는다.
Posted by xHuro
,
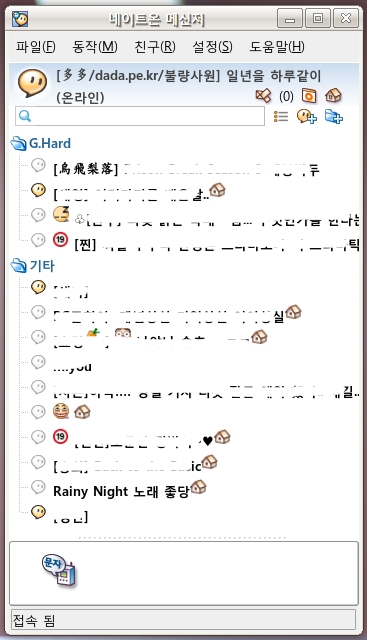
소스를 다운로드받아 설치해야 한다. 소스는 여기에 있다. (그러고 보니, 버전이 1.0이군)
사용자 삽입 이미지

윈도우용과 크게 다를바가 없다.

그다지 메신저를 헤비하게 사용하는 유저가 아니라서, 어느 정도 퀄리티에 만족하려고 했더니...
M$ Windows용이랑 크게 달라진게 없어보인다. (Gaim Plugin용만 쓰다가 이걸 보니... 감격이다.)

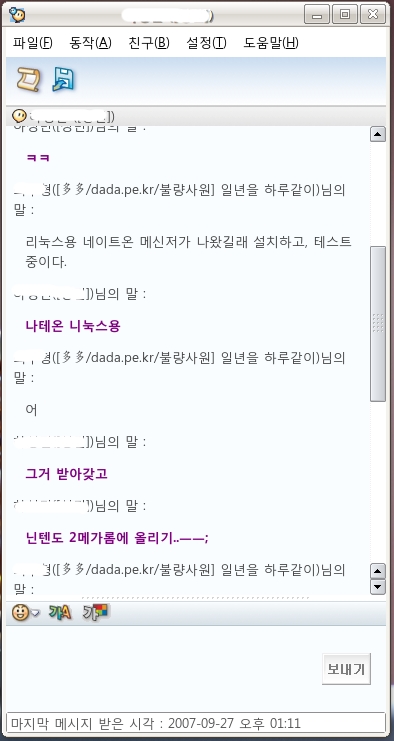
혹시나 해서, 채팅 테스트도 해봤다.
사용자 삽입 이미지

오~ 놀라워라... 채팅도 잘 되네?


아주 무난하게 사용할 수 있다. 오히려 nateon 헤비유저들은 거부감없이 사용할 수 있을 꺼 같다.
나머지 환경설정이라던가 기타 메뉴들은 원래 내가 안쓰는 설정이라서, 자세히 M$ Windows와 비교할 수가 없겠다. 쩝...

잠깐 사용해본 결과, 리눅스용 네이트온의 단점이라고 생각되는 점은,
1. 워낙 배포판 종류가 다양하다 보니, 직접 컴파일해야 된다는 점. (Linux를 배우는 사람의 입장에서는 엄청난 곤욕을 치뤄야 할지도 모른다. 특히 컴파일에 익숙하지 않는 유저들에겐^^;;)

2. KDE 기반이다 보니, 다른 데스크탑 환경을 사용하는 유저들은 컴파일시 수많은 라이브러리 에러와 싸워야한다는 점.

3. 미니홈피 아이콘을 누르면, KDE의 Konqueror가 기본 웹브라우저로 잡혀서 실행된다는 점.(KDE와 Qt 위에서 만들어졌기 때문이라 생각된다.)

세번째 문제는 그다지 신경쓰지 않아도 될 꺼 같고, 치명적인 첫번째와 두번째 문제는 홈페이지와 README 파일에서 밝히고 있듯이 조만간 배포판별로 패키징될 예정이라 하니, 여유가지고 지켜보면 쉽게 설치할 수 있는 버전이 출시될꺼라 믿는다. 첫술에 배부를리가 없잖아?

마지막으로, M$ Windows에 밀려 소수만 사용하는 Linux Desktop에, 사용자층이 두터운 nateon을 포팅한 개발팀의 용기에 큰 박수를 보내고 싶다. 주위에서 수많은 만류와 압력이 있지 않았을까 하는...

사용자층이 그리 많지 않겠지만, 대기업에서의 이런 시도는 또하나의 이정표로 남지 않을까라는 생각을 하면서 어설픈 리뷰 끝!

p.s1 욕심이 있다면 이참에 nateon에 MSN과 Gtalk도 플러그인으로 제공해달라는... 퍽! 잉?
Posted by xHuro
,
#서론
간만에 python과 TurboGears의 정리 포스트다. 대략 2달전쯤 끄적여놓은 건데, 이제서야 정리하게 되었다.
TurboGears의 TGWebService 라이브러리는 간단하게 WebService 메소드와 WSDL을 생성해준다.
ZSI는 TGWebService가 생성한 WSDL로 WebService Client를 위한 클래스들을 생성해준다.

이번 포스트에서는 TGWebService와 ZSI를 이용해서 간단한 WebService Server/Client를 생성해본다.
필요한 라이브러리는 다 설치되어 있다는 가정하에 진행하도록 한다.


#필요한 Python Library


#TurboGears의 새 프로젝트 생성하기
tg-admin quickstart CodeGeass


#WebService로 제공할 클래스와 메소드를 정의하기
from tgwebservices.controllers import WebServicesRoot, \
    WebServicesController, wsexpose, wsvalidate

from tgwebservices.runtime import typedproperty, unsigned
class Person(object):        
    name = ''
    id = ''

class CodeGeass(WebServicesRoot):
    @wsexpose(Person)
    @wsvalidate(Person)
    def getPerson(self, value):
        person = Person()
        person.id = value.name
        person.name = value.id

        return person

- @wsexpose는 getPerson이 반환하는 class의 type이다.
- @wsvalidate는 getPerson이 호출될때의 parameter type이다.
- type에는 built-in type(int, str 등)과 user-define class(단 object 상속해야한다)들이 포함될 수 있다.


#TurboGears의 root controller에 TGWebService 연결하기(controller.py에 하위 클래스 추가)
from turbogears import controllers, expose, flash
from codegeass import CodeGeass
# from model import *        
# import logging             
# log = logging.getLogger("codegeass.controllers")

class Root(controllers.RootController):
    codegeass = CodeGeass("http://localhost:8080/codegeass/")

    @expose(template="codegeass.templates.welcome")
    def index(self):
        import time          
        # log.debug("Happy TurboGears Controller Responding For Duty")
        flash("Your application is now running")
        return dict(now=time.ctime())

- codegeass = .... 이 부분이 앞에서 만들어놓은 CodeGeass class를 root controller와 연결하는 구문이다. 생성자의 parameter는  CodeGeass의 instance가  web상에서 호출되는 URI를 다 넣어준다. (http://localhost:8080/codegeass/ 에서 codegeass/가 해당된다. 이해 잘 안된다면 TurboGears의 controller에 대해 구글링해서 공부하는 것이 좋다)


#TurboGears 서버 구동하기
./start-codegeass.py


#TGWebService로 생성된 WSDL 확인하기
http://localhost:8080/codegeass/soap/api.wsdl

<?xml version="1.0" encoding="UTF-8"?>
<wsdl:definitions xmlns:wsdl="http://schemas.xmlsoap.org/wsdl/" xmlns:soap="http://schemas.xmlsoap.org/wsdl/soap/" xmlns:xsd="http://www.w3.org/2001/XMLSchema" name="CodeGeass" xmlns:types="http://localhost:8080/codegeass/soap/types" xmlns:soapenc="http://www.w3.org/2001/09/soap-encoding" targetNamespace="http://localhost:8080/codegeass/soap/" xmlns:tns="http://localhost:8080/codegeass/soap/">
   <wsdl:types>
     <xsd:schema elementFormDefault="qualified" targetNamespace="http://localhost:8080/codegeass/soap/types">
        <xsd:complexType name="Person">
          <xsd:sequence>
            <xsd:element name="id" type="xsd:string"/><xsd:element name="name" type="xsd:string"/>
          </xsd:sequence>
        </xsd:complexType>
          <xsd:element name="getPerson">
            <xsd:complexType>
              <xsd:sequence>
                <xsd:element name="value" type="types:Person"/>
              </xsd:sequence>
            </xsd:complexType>
          </xsd:element>
          <xsd:element name="getPersonResponse">
            <xsd:complexType>
              <xsd:sequence>
                <xsd:element name="result" type="types:Person"/>
              </xsd:sequence>
            </xsd:complexType>
          </xsd:element>
      </xsd:schema>
   </wsdl:types>

   <wsdl:message name="getPersonRequest" xmlns="http://localhost:8080/codegeass/soap/types">
       <wsdl:part name="parameters" element="types:getPerson"/>
   </wsdl:message>

   <wsdl:message name="getPersonResponse" xmlns="http://localhost:8080/codegeass/soap/types">
      <wsdl:part name="parameters" element="types:getPersonResponse"/>
   </wsdl:message>
   <wsdl:portType name="CodeGeass_PortType">
      <wsdl:operation name="getPerson">
         <wsdl:input message="tns:getPersonRequest"/>
         <wsdl:output message="tns:getPersonResponse"/>
      </wsdl:operation>
   </wsdl:portType>

   <wsdl:binding name="CodeGeass_Binding" type="tns:CodeGeass_PortType">
      <soap:binding style="document" transport="http://schemas.xmlsoap.org/soap/http"/>
      <wsdl:operation name="getPerson">
         <soap:operation soapAction="getPerson"/>
         <wsdl:input>
            <soap:body use="literal"/>
         </wsdl:input>
         <wsdl:output>
            <soap:body use="literal"/>
         </wsdl:output>
      </wsdl:operation>
   </wsdl:binding>

   <wsdl:service name="CodeGeass">
      <wsdl:documentation>WSDL File for CodeGeass</wsdl:documentation>
      <wsdl:port binding="tns:CodeGeass_Binding" name="CodeGeass_PortType">
         <soap:address location="http://localhost:8080/codegeass/soap/"/>
      </wsdl:port>
   </wsdl:service>
</wsdl:definitions>

- xml로 정의된 Person, 그리고 getPerson을 볼 수 있다.
- 몇개의 URL이 더 있는데, TGWebServices의 README.txt의 URLs를 참고하면 된다.


#ZSI로 WebService client를 위한 코드 생성하기
wsdl2py --url http://localhost:8080/codegeass/soap/api.wsdl

-WSDL을 이용해서 코드를 생성한다.(Code Generation from WSDL and XML Schema 참고) 위의 명령을 실행하면 다음과 같은 python 파일이 생성된다.
CodeGeass_services.py : TGWebServices에서의 portType, Locator 등의 Class가 있는 파일
CodeGeass_services_types.py : TGWebServices에서 정의된 Data Type이 정의된 Class가 있는 파일  


#생성된 코드를 이용하여 WebService Client 만들기
from CodeGeass_services import *
from CodeGeass_services_types import ns0

loc = CodeGeassLocator()
port = loc.getCodeGeass_PortType()
req = getPersonRequest()

inputMessage = ns0.Person_Def(None, None)
inputMessage._id = "dada"
inputMessage._name = "lulush"

req._value = inputMessage
res = port.getPerson(req)

returnMessage = res._result
print "Result ID:", returnMessage._id
print "Result name:", returnMessage._name

Locator와 Port를 설정하고, 호출할 메소드의 Request(getPerson+Request)에 파라메터를 넣는다.
그리고 Port를 통해 호출하면 값을 받아올 수 있다.
req._value 와 res._result는 위의 WSDL의 <xsd:element name="getPerson">, <xsd:element name="getPersonResponse">에서 하위 노드의 value 값과 매칭된다.


#실행

위의 소스 코드를 실행하면, inputMessage의 _id와 _name이 swap되어 나오면 정상적으로 처리된 것이다.


#결론
TGWebService를 사용해서 간단히 WSDL을 만들고, 그 WSDL을 ZSI로 코드 생성하고 클라이언트 만드는 방법을 알아보았다. 여기서는 TGWebService의 WSDL을 사용했는데, 조금 응용하면 자바, php등의 WSDL을 가지고 Client를 만들 수 있으며, 역으로 다른 시스템에서 TGWebService의 WSDL로 Client를 생성할 수도 있다.
다음 포스팅은 Java의 XFire와 TGWebService의 연동 방법에 대해 알아본다.
Posted by xHuro
,
cx_Oracle을 사용하다보면, utf-8로 인코딩된 데이터들을 table에 insert하면 모조리 ???로 바뀌는 상황이 발생한다.
cx_Oracle의 encoding이 US-ASCII 로 잡혀있기 때문이다.
다음 코드로 encoding을 확인할 수 있다.

import cx_Oracle
conn = cx_Oracle.connect('test/test@TYPED')
conn.encoding

US-ASCII 일 경우, 다음 처럼 NLS을 설정하면 쉽게 해결된다.

import os
os.environ['NLS_LANG'] = '.UTF8'

import cx_Oracle
conn = cx_Oracle.connect('test/test@TYPED')
conn.encoding
Posted by xHuro
,
사용자 삽입 이미지

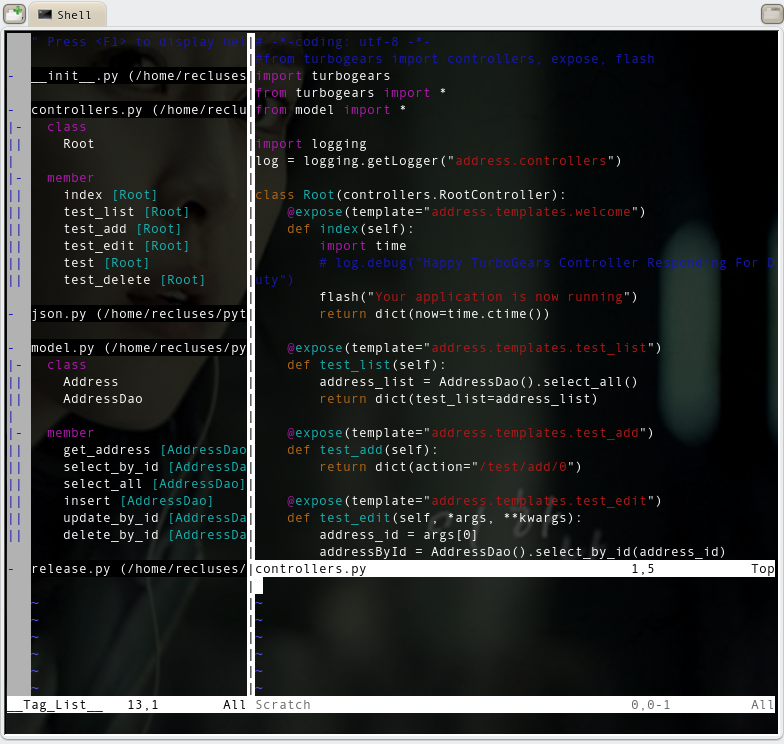
내 로컬에서의 vim 환경

python을 위한 vim 플러그인들 : runscript.vim, taglist.vim, python.vim

이클립스 플러그인 중의 하나인 pydev를 사용해도 되긴하지만, 서버에서 직접 코딩하는 경우가 많기 때문에 여러가지 플러그인을 설치했다. (다시 한번 vim의 확장성에 감탄하는 중...)
Posted by xHuro
,
TurboGears에서 SQLObject를 이용한 Unit Test시 dburi을 설정하지 않으면, 기본적으로 sqlite(memory DB)로 설정된다. Unit Test시에는 아래와 같이 초기에 설정해준다.

from turbogears import testutil, database
database.set_db_uri("db2://test:test@dada.pe.kr")


여기서 db2 대신, 각각 쓰고 있는 DB로 설정하면된다.
Posted by xHuro
,
이미 많은 블로거분들이 compiz-fusion에 대해 언급했었다.

crackradio님 : beryl 에서 compiz-fusion 으로 변경
sakuragi님 : Beryl과 Compiz이 합쳐진 후 수개월... Compiz-Fusion

여기에 덧붙여서 Kubuntu에서의 setting에 잠시 언급한다. Gnome 기반의 Ubuntu 유저들은 위의 포스트를 참고하면 되겠다. gnome과 달리 KDE에서 설치해야되는 패키지는 다음과 같다. (약간 다르다)

연두색 박스는 터미널에서 실행하는 명령들이고, 노란색 박스는 편집해야하는 내용이다.

sudo apt-get install compiz compiz-kde compizconfig-settings-manager compiz-fusion-plugins-extra libcompizconfig-backend-kconfig emerald emerald-themes

emerald와 emerald-themes를 넣은 이유는, 아래의 start_compiz.sh 에서 emerald를 사용하도록 설정했기 때문이다.  emerald 사용하도록 설정하고 emerald를 설치하지 않으면 숱하게 보아왔던 window title이 사라진다^^
emerald를 사용하지 않으려면 start_compiz.sh의 -c emerald 부분을 제외하도록 한다.

이전의 beryl과 같은 파일들(startxgl.sh, xgl.desktop, start_compiz.sh)을 생성하고 편집한다.


ATI의 경우 setting
1. startxgl.sh 편집
sudo vi /usr/local/bin/startxgl.sh

#!/bin/sh
Xgl -fullscreen :1 -ac -br -accel glx:pbuffer -accel xv:pbuffer &
export DISPLAY=:1
exec startkde

sudo chmod 755 startxgl.sh


2. xgl.desktop 편집
sudo vi /usr/share/xsessions/xgl.desktop

[Desktop Entry]
Encoding=UTF-8
Name=Xgl
Exec=/usr/local/bin/startxgl.sh
Icon=
Type=Application

3. start_compiz.sh 편집
vi ~/.kde/Autostart/start_compiz.sh

compiz --replace -c emerald &

sudo chmod 755 start_compiz.sh


nVIDIA의 경우 setting
1. startxgl.sh 편집
sudo vi /usr/local/bin/startxgl.sh

#!/bin/sh
Xgl :1 -fullscreen -ac -accel xv:fbo -accel glx:pbuffer & DISPLAY=:1
exec startkde

sudo chmod 755 startxgl.sh

2. xgl.desktop 및 start_compiz.sh는 ATI와 동일하다.

Posted by xHuro
,
class RegisterTest(unittest.TestCase):
    pass

def suite():
    suite = unittest.TestSuite()
    suite.addTest(unittest.makeSuite(RegisterTest))
    return suite


unittest.TextTestRunner(verbosity=2).run(suite())

unittest.TestCase를 사용할 때 TestSuite에 넣고 Test 실행하기.
각 test case에 대해 comment를 달면, comment도 같이 출력되어 보기가 좋다.

시간날때 좀더 업데이트 해야겠다.

Posted by xHuro
,
from time import time

def test:
    pass

start = time()

for index in range(0,1000):
    test()

end = time()

print 'total time : ' + str(end - start)


간단한 python code. 별거 아닌데, 익숙치가 않아서 모듈들이 헷갈린다.
기억력을 믿지 말고 검색과 기록을 생활화 해야한다^^
Posted by xHuro
,
Ubuntu 공식 사이트의 첫페이지, 왼쪽 상단 사진의 남자가 Dell T-Shirt를 입었다.

이로써, Dell에서 Ubuntu가 설치된 제품군 출시가 얼마남지 않았다는 걸 느낄 수 있다. (이 제품군과 여기에 설치된 Ubuntu에 대해서는 다음에 다시 언급해야겠다.)

사용자 삽입 이미지

Posted by xHuro
,
Matt Hartley가 주목해야할 오픈 소스 프로젝트 15가지에 대해서 포스팅했다.

개발자를 위한 라이브러리 등의 오픈소스이기 보다는 일반 사용자들이 데스크탑에서 사용할 수 있는 어플리케이션 15개를 소개하고 있다. 다음은 언급한 목록에 대해 간단히 설명을 해보았다.

원문이 여기로

1. CNR
: 유명한 배포판들의 패키지를 쉽게 찾아 설치할 수 있는 데스크탑 소프트웨어. 2007년 2쿼터에 Release 예정

2. Kdenlive : 쉽게 말해 어도비 프리미어를 대체할 수 있는 Linux용 Video 소프트웨어

3. Ardour : Digital Audio Editor. Audio 전문가를 위한 Application인데, 전에 포스팅했던 UbuntuStudio에도 포함되어 있는 소프트웨어

4. Democracy : Internet TV Viwer 이지만, 동영상 파일 재생 및 RSS를 이용해서 video, podcast 등을 볼 수 있고, YouTube 검색 등도 할 수 있는 소프트웨어 (스트리밍이 아니라, 다운로드 방식인듯)

5. Jokosher : Ardour보다는 쉽고 간단한 UI를 가진 Digital Audio Editor. 역시나 전문적인 지식이 없으므로 패스.

6. Wied : 간단한 무선 네트워크 설정툴. 난 kdenetwork를 사용하고 있어서...^^;;

7. Gparted Live CD : 파티션 관리 툴.

8. Second Life client software : 가상 현실에서의 새로운 삶을 살아보자. 단, 영어가 되어야 한다는 거~

9. Virtual Box : 말이 필요없다.

10. Automatix : Ubuntu User들에게는 친숙한, 그러나 나를 가슴아프게 했던 그 소프트웨어.

11. Envy : Linux에서의 Video Driver를 쉽게 설치할 수 있게 도와주는 소프트웨어. 처음 Linux Desktop를 접하는 User들에게 많은 도움이 될 듯.

12. Conduit : 컴퓨터간, 로컬 컴퓨터랑 웹사이 등등의 파일, 이메일, 북마크 등의 Sync를 맞춰주는 프로그램. 아직까지는 미흡하다는 거.

13. Jabbin : 구글톡 등 Jabber protocol 기반의 메신저 프로그램. 음성채팅도 지원한다

14. Gfreglet : 노트북의 CPU 사용량/Frequency를 보여준다는데, Ubuntu에 기본적으로 설치된 것과의 차이점은... 모르겠다^^;;

15. Referencer : 문서 파일에 태그를 달아 관리할 수 있는 소프트웨어. e-book 등 쉽게 관리할 수 있을 듯.
Posted by xHuro
,
주말에 WWI에서 스타크래프트2가 공개된 후, Linuxer에게도 크게 자극이되었나 보다.
현재 나와있는, 그리고 앞으로 나올 Blizzard 소프트웨어들의 인스톨러를 Linux용으로 만들어 달라는 청원서까지 돌고 있다.

나 또한 Blizzard사의 게임들을 좋아해서 한표 눌러줬다^^
사용자 삽입 이미지

나도 사인했다^^;;


유독 우리나라에서만 Blizzard가 잘 나간다고 생각했었는데, 꼭 그런 것만은 아닌가 보다.
(현재 청원 넣은 사람들을 훑어보니 독일과 영국사람도 꽤 보인다.)

Blizzard 게임을 좋아하는 Linux 유저라면 참여해서 한표 꾹 눌러주길...
Blizzard 게임이 Linux로 나온다고 해서 나쁠 건 없지않는가?
Posted by xHuro
,
꽤 늦은 소식 하나.

멀티미디어 저작도구로 가득찬 UbuntuStudio 7.04가 5월 10일 Release 되었다.
(그때는 이상하게 공식사이트에 들어가지질 않았다.)

Audio, Video, Graphic까지 다양한 멀티미디어 도구들이 한 세트로 묶여서 Ubuntu의 또하나 배포 버전으로 Release된 것이다.

기존 7.04 유저들은 간단히 apt-get 명령으로 다운로드 받을 수 있다.
sudo aptitude install ubuntustudio-graphics ubuntustudiolauncher ubuntustudio-audio-plugins ubuntustudio-video ubuntustudio-audio

10여분간 deb를 다운로드 받고 설치 후에 메뉴를 보면...
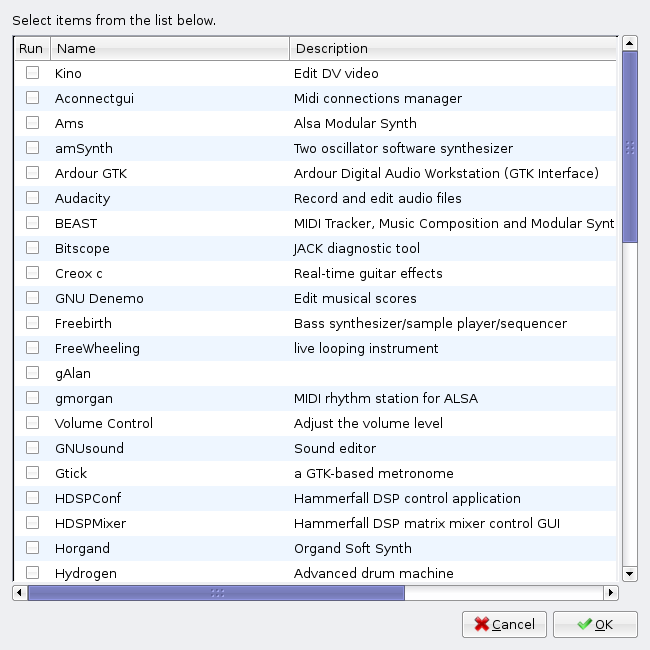
수많은 툴들이 설치된 것을 느낄 수 있다.

사용자 삽입 이미지

ubuntustdio lancher로 본 멀티미디어 도구들


그다지 멀티미디어쪽으로는 지식이 깊지 않아, 이 많은 툴들 중 몇개만 알고 있는데 각자 필요한 부분만 따로 설치해서(ubuntustudio-graphics, ubuntustudio-video, ubuntustudio-audio)테스트해보는 것도 괜찮을 듯.

Ubuntu의 Desktop 환경으로 향한 행보는 드디어 멀티미디어 저작 환경까지 도달했다.
다음 Desktop 환경 타겟은 어디일까?
Posted by xHuro
,

요즘들어(Ubuntu 7.04가 나온 후 부쩍), 주위에서 Ubuntu/Kubuntu에 대해 물어보는 사람들이 늘어남에 따라, 이제 Linux Desktop 환경이 많이 알려지고 있음을 느낄 수 있다.

데스크탑과 노트북을 Windows에서 Ubuntu 환경으로 완전히 옮긴지 이제 6개월이 넘어간다. 작년 이 맘때쯤부터 준비한 기간이 6개월정도 걸렸으니, 대충 이주한지 만 1년이 지났다.(메인 환경으로 쓴게 1년이 지났다는 말이다. 약 5년간 한컴 Linux, RedHat 계열, Mandrake/Manriva, Suse, Slackware를 거쳐 Ubuntu에 안착했다. 즉, 메인으로 쓰지 않았을 뿐이지, 여러 배포판에서 겪을 수 있는 삽질은 조금씩 겪어봤다.)

만 1년동안 준비하면서, 느낀점과 몇가지 조언을 정리해봤다.

첫번째, 어떤 용도로 사용할 것인가?

특히 게임을 주로 하는 사람에게는 그냥 Windows를 사용하는 게 좋다. Windows에서 돌아가는 게임 중 99%는 안 돌아가니까.

Linux 환경은 웹 프로그래밍이나 자바 혹은 네트워크 프로그래밍 개발하는 사람들에게는 나쁘지 않다. (단, Windows Client 프로그래머는 제외되겠지만^^)

인터넷을 주로 사용하고, 문서 작업하는 사람들도 충분히 사용가능하다. 약간의 불편함 (MS Office보다 덜 화려하고, 기능이 조금 아쉬운 Open Office를 사용해야 하므로)을 감수한다면 충분히 부담없이 사용할 수 있다. 인터넷 뱅킹 부분도 아쉬운 데로 virtual machine 위에서 사용가능하다.

두번째, 어떤 프로그램을 주로 사용할 것인가?

내 가 아는 지인 중에서 Windows 정품 사용하는 사람은 거의 없다. 인터넷, 웹하드 등 여기저기 다니면 널고 널린게 Windows용 상용 프로그램과 그 시리얼이다. 상용프로그램은 돈을 받고 파는 만큼, 기능이 다양하고 화려하다.

그에 비해, Linux용 프로그램은 거의 Open Source 이거나, Freeware다. 불법으로 사용할 일도 별로 없다.불행히도 Windows용 상용 프로그램과 비슷한 기능을 제공하고 있지만, 그만큼 기능이 다양하진 않다.

즉, Windows에서 충분히 잘 사용하고 있는 프로그램들을 포기하고 Linux용 프로그램들에 적응해야할 끈기가 필요하다. 마치 일반 키보드를 사용하다가 HHK(해피 해킹 키보드)를 처음 접할 때의 황당함을 느낄 것이다.

세번째, Linux에 대해 무엇을 알고 있는가?

소 위 Linux = 삽질이다. (물론 Windows도 삽질이 필요할 때가 있긴 하지만, Linux에 비해 양반이다.) 지금은 그나마 많이 나아졌지만, 그래도 삽질은 항상 존재한다. 어떤 프로그램을 설치하고 실행해보면 이상한 에러가 나면서 도무지 실행이 되질 않는다.

이럴 때 어떻게 해야될까? 어라 안되네, 하면서 포기해야 할까?

Kernel을 파악하고, X-windows의 구조를 파악해라는 소리가 아니라, 어떤 문제에 부딪쳤을 때 이거저거 해보는 용기가 필요하다. 지금도 전세계의 수많은 사람들이 같은 문제에 부딪쳐서 삽질하고, 그에 대한 해답을 내놓고 있다. 조금 더 열심히 찾아보고, 조금 더 적극적으로 이거저거 해보라. 분명히 답은 어딘가에 있다.

Linux에 대해 아무것도 몰라도 된다. 다만 투자할 시간과 노력을 아까워해서는 안된다.

네번째, 그래도 이주하고 싶다면, 현재 사용하고 있는 Windows용 프로그램 목록을 만들고 유사한 Linux용 프로그램을 찾아보자.

Windows용 프로그램보다 UI가 이쁘지 않거나 기능이 빠질 수도 있지만, 핵심적이고 필요한 기능들은 다 가진 Linux용 프로그램이 왠만큼 있다. 오히려 더 강력한 기능을 가진 녀석들도 많다.

오래전부터 주위 사람들에게나 여러 포럼에서 Linux 설치가 너무 어렵고, 할 것도 없다는 푸념을 참 많이 들어왔다. 지금 이 포스트 작성하는 이유도 저런 푸념에 대한 조언쯤 될 것이다.

덧. 호기심으로 설치하여 몇번 클릭 해보고, 이거 어렵네, 사용하기 불편하네. 하면서 투덜거리지 말라. 어느 누가 Linux를 Desktop으로 사용하라고 강요하지 않는다.

Posted by xHuro
,
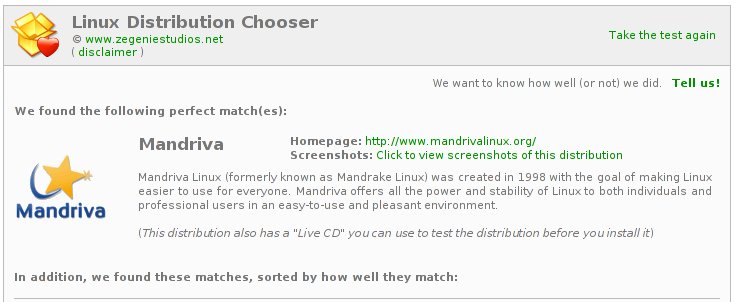
Linux Distribution Chooser 라는 재미있는 페이지가 있어 테스트 해보았다.
의역을 하자면, 당신에게 알맞은 Linux 배포판은? 라고 할 수 있겠다.

쉬운 영어로 되어 있으니, Linux를 설치해보고픈 사람은 테스트 해보는 것도 괜찮을 것이다.
테스트 하러가기

내 결과다.

작년 임베디드 실험하면서 잠시 썼던 맨드리바가 테스트 결과로 나왔다(물론 그전에 맨드레이크를 사용하기도 했었다.), 여전히 rpm형식은 나와 맞지 않는 것같아 그 후 Ubuntu로 옮겼었다. (개인적으로 레드햇 계열을 그다지 좋아하지 않는다. 아니, 싫어한다는 것이 맞을 것이다^^)

테스트 결과를 보니, 다시 맨드리바로 갈아타고 싶은 마음도... 잠시 생겼으나, 또 포멧하고 세팅할 생각하니 눈 앞이 깜깜해져서 포기했다. 
Posted by xHuro
,
최근 올블로그에서 맥을 써야 되는 이유 vs 맥을 쓰지말아야 되는 이유 토론이 여기저기서 벌어진 것으로 알고있다.
나야 Linux 유저로서, 건너마을 불 구경하듯이 하고 있었는데, (솔직히 vi 냐 emacs냐. java 냐 c++이냐... 등등의 논쟁과 다르지 않다고 생각한다) 오늘 우연히 재미있는 포스트를 발견했다.

바로, 우분투를 써야 되는 이유(Reasons to use Ubuntu over XP and OSX for a everyday comptuer)이다.
근거로 들고 있는 것들은 내가 보기엔 일반적인 근거지만, 맥을 써야되는 가 말아야 되는 가에 대한 또하나의 대안(?)으로서 제시할 수 있는 주장이 아닐까?
Posted by xHuro
,
UbuntuWeeklyNewsletter/Issue15 에 소개된 내용,
이전 포스트 (http://www.kid.pe.kr/tt/403) 랑 비교해서 적용하면 훨씬 이쁜 OSX(?)가 만들어질 거 같다.

http://www.supriyadisw.net/2006/09/ultimate-ubuntu-dapper-look-like-osx
Posted by xHuro
,
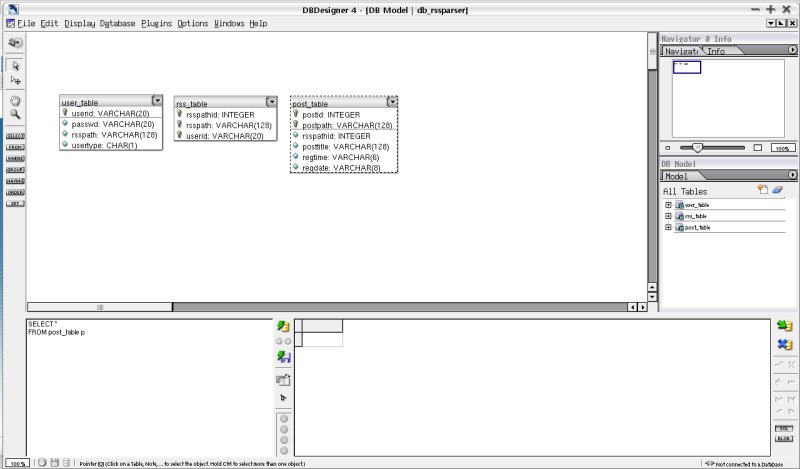
Ubuntu에서 쓸만한 DB designer 하나.

http://www.fabforce.net/dbdesigner4/index.php 에서 다운로드 받을 수 있다.

무료(?) DB designer. 윈도우용도 있다.


언제나 그렇듯 폰트랑 한글처리가 아쉽긴 하지만 쓸만하다.

Tips : 실행시,
libborqt-6.9-qt2.3.so: 동적 오브젝트 파일을 열 수 없습니다: 그런 파일이나 디렉토리가 없음

에러 발생하면 아래의 명령으로 다운로드 받아, 압축풀고 /usr/lib에 넣어두면 OK~
wget http://www.bnr2.org/libborqt-6.9.0-qt2.3.so.tgz
Posted by xHuro
,